Is there anything so magical as turning a heel successfully? It strikes fear into the hearts of sock newbies but fast becomes a thing of joy once you've learnt how.
A traditional heel flap is taken from a knitting tradition. It converts well to crochet and gives a good fit on most feet and creates a solid fabric at a point where a lot of wear occurs and is easy to darn.
This tutorial is for a cuff down traditional heel flap in crochet, toe up ones will create the same shaping but in reverse. As a side note, I tend to prefer cuff down socks as I find it easier to check for fit as I work and being sure I can pull the cuff over my instep before I've worked too much is a positive boon as its the trickiest aspect of fit.
The photos are taken from the Tipping the Scales Socks but its the same technique as I used in Riley and Saunders socks and that many other crochet socks patterns will use and I will undoubtedly use again.
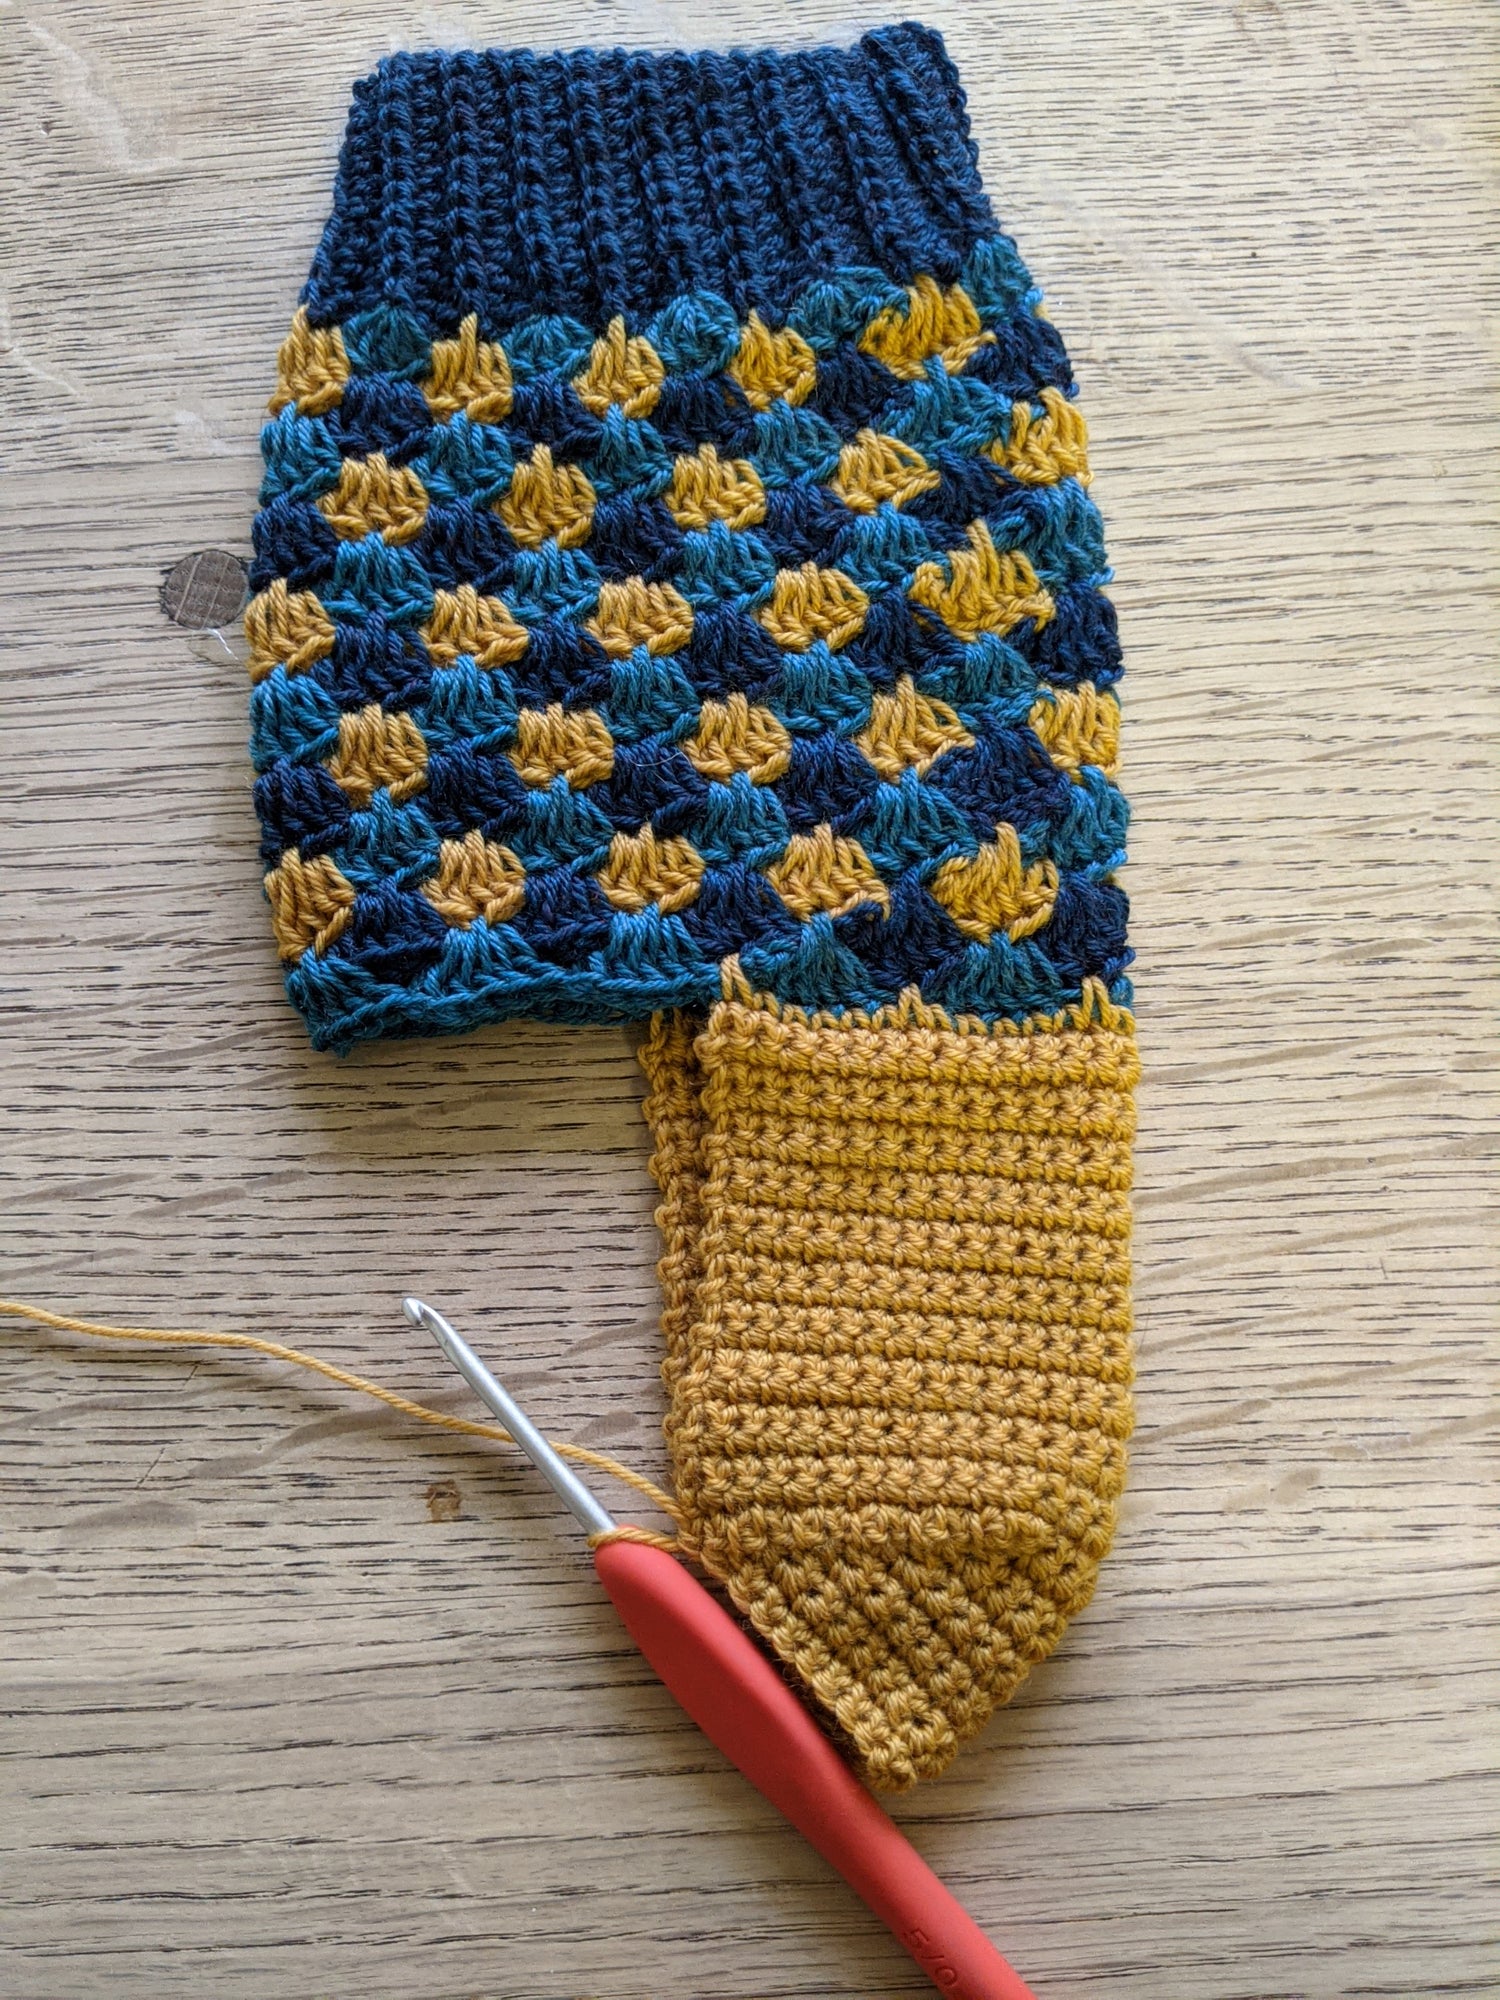
Start with your completed ankle worked as long as you would like it.
|
|
1/Work across the stitches of the ankle as directed. You'll normally work about half of the ankle stitches to make the heel flap.
|
|
2/Work back and forth on those heel stitches to make a heel flap. Work for as many rows as set out in your pattern. You've now made a rectangular flap.
|
|
3/Now we turn the heel, first you'll work across the heel stitiches to just past the centre then turn leaving unworked stitches.
|
|
4/Then you work back again just past the centre and turn again so you have a very short row in the centre of your heel. At this point you should have the same number of unused stitches on either side of this very short row.
|
|
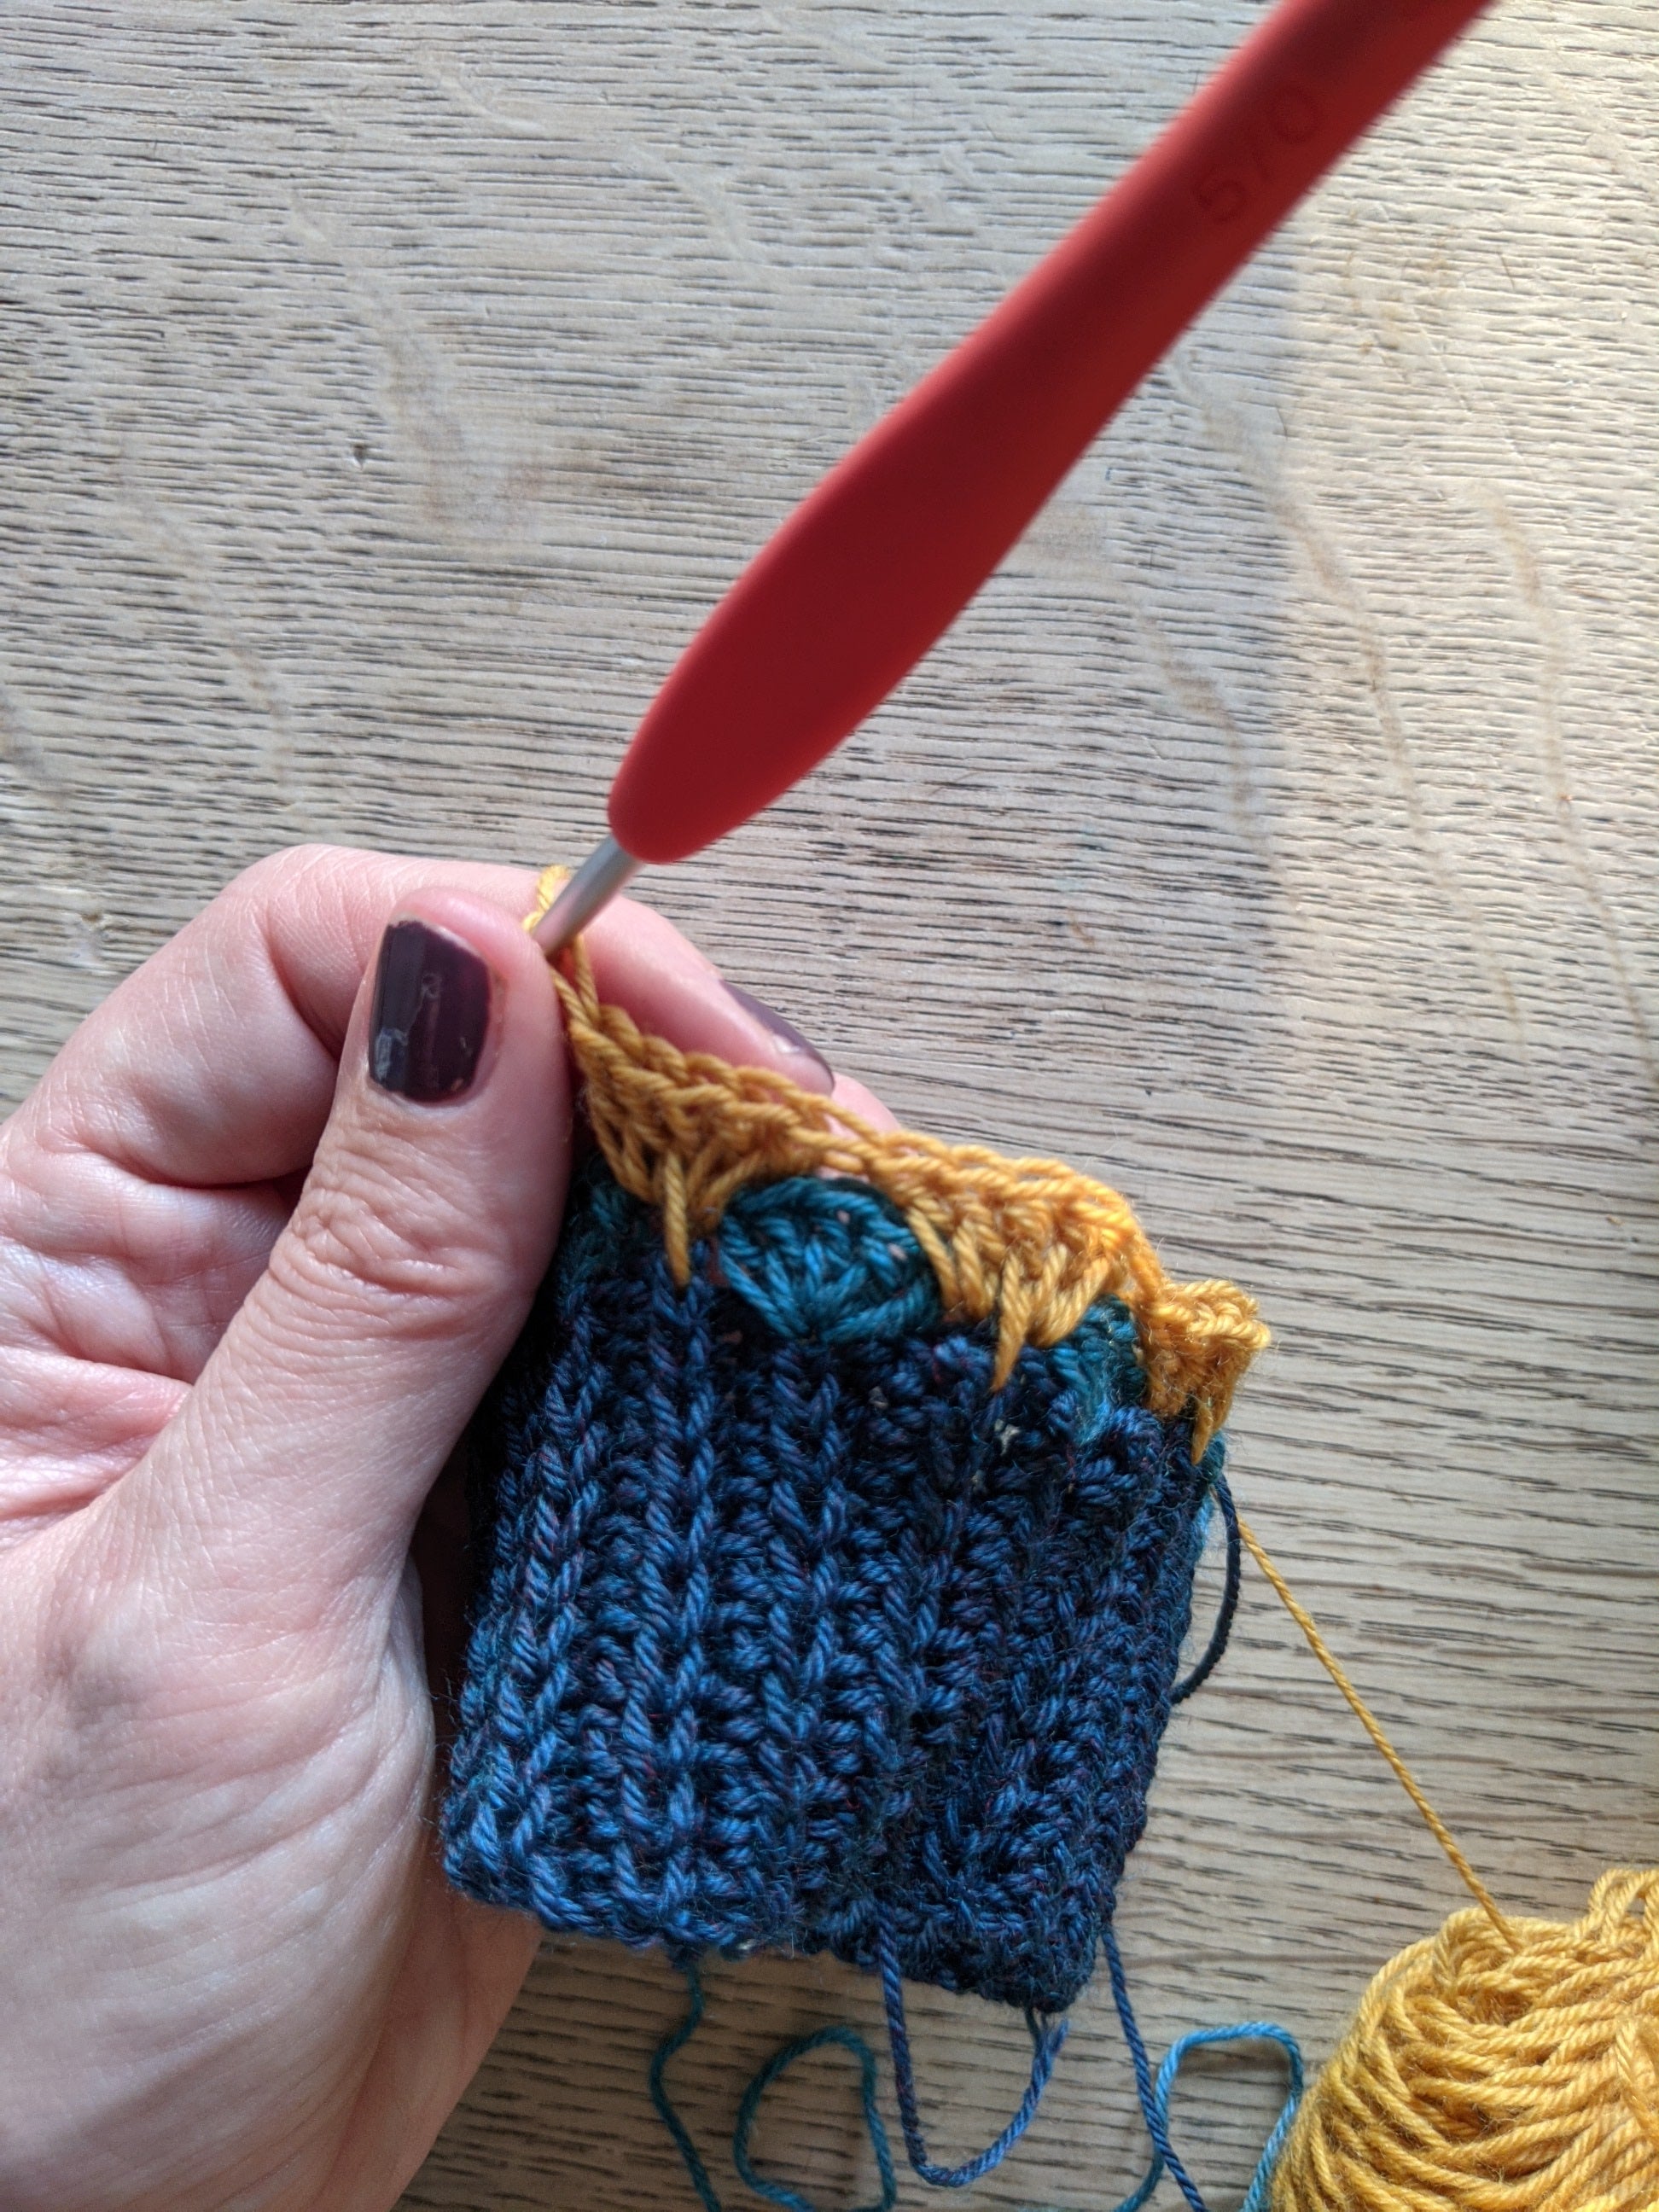
5/ You are going to start working short rows that get longer and incorporate the unused stitches we saw in the last step, until they are all used. Other patterns may have a slightly different method for working short rows but in our patterns you'll work as follows: Work up to the stitch before the end of the previous row and then work the last stitch of the row together with the next unused stitch from the heel flap. The picture shows the yarn drawn through both of these places before drawing through to finish the stitch so hopefully you can see where you are meant to work.
|
|
6/As you work back and forth repeating this process the heel begins to curve around and shape and you carry on working back and forth until there are no usused stitches left. You'll have fewer stitches on your turned heel than you did on your heel flap as you have been decreasing as you worked.
|
|
And there you have it, a finished heel. It should look something like this and you'll be ready to work the instep next.
|
|
The next step is to join the heel back into the round. Again this will vary a little pattern to pattern so I've shown here how it works for the Tipping the Scales Socks but it will be broadly applicable to other patterns.
7/you should have ended with a wrong side row so you'll turn to the rightside and work in dc back along all the heel turn stitches.
|
|
8/rotate your work and pick up stitches evenly down the row ends of the heel flap, placing a marker in the last of these. For this pattern we picked up one stitch every other row, placing them evenly makes them almost invisible.
|
|
9/Now we join to the top of the ankle, this will normally be in the stitch pattern you used on the ankle. Then you need to work up the unsed row ends of the heel flap.
|
|
10/Different patterns will place the new round end in different places (you'll see from the colour changes that in Tipping the Scales it ended after working across the ankle and before we worked back up the otherside of the heel flap) but however those are placed we now have a round that goes all around the heel and the unused top of the ankle.
|
|
11/ you'll notice that you've got a fair few stitches more at this point than you need for the foot,These will typically be reduced in the next section by placing decreases near where the ankle was joined until the foot has a similar number of stitches to the ankle.This is a good place to make fine adjustment on fit as you can do more or fewer decreases.
|
|
I hope this helps to demystify it a little. The best way to learn really is to give it a go so you can see for yourself how it all comes together.
Want more in depth sock tutorials including left and right handed technique videos? Our Crochet Socks class covers everything you need to know for perfect fitting socks.
Ready to give it a go? Shop our collection of socks below...
Leave a comment
All comments are moderated before being published.
This site is protected by reCAPTCHA and the Google Privacy Policy and Terms of Service apply.